How do you configure Netgear switches with the CX-Engine?
In this comprehensive article, we'll show you step by step how to configure Netgear switches with the CX-Engine. The CX-Engine is a powerful platform that enables you to manage your networks simply and efficiently.
What is the CX-Engine?
The CX-Engine is an innovative software solution specifically developed for managing network infrastructures in the event technology sector. It provides you with a user-friendly web-based interface featuring powerful functions that enable you to configure your devices efficiently. With the CX-Engine, you can quickly and easily adapt your networks to meet the changing requirements of your business. It serves as a central management platform for various network devices.
In the field of event technology and live events, the CX-Engine has proven particularly valuable as it enables seamless integration with various AV devices and technologies. The preconfigured presets allow you to configure your network settings quickly and easily, so you can focus on what matters most: your event.
Key features of the CX-Engine:
- Centralized Management: Manage multiple switches through a single user interface
- Preset Management: Use predefined configuration templates for common use cases
- Backup and Restore: Backup and restore your configurations
What is Netgear's AV-Line?
Netgear's AV-Line is a special product line developed for the requirements of audio and video transmission in professional AV environments. These switches offer you functions and performance features optimized for processing high-resolution video and audio.
Important features of the AV-Line:
QoS (Quality of Service): The AV-Line switches support advanced QoS functions that enable prioritized transmission of your audio and video data packets. This is crucial for ensuring high quality and low latency when transmitting your AV content.
PoE (Power over Ethernet): Many AV-Line models offer you PoE+ (30W) and PoE++ (60-90W) support, allowing you to power connected AV devices such as PTZ cameras, microphones, and digital signage displays via the Ethernet cable. This significantly simplifies your installation and reduces cable requirements.
Easy Integration: The AV-Line switches are designed to integrate seamlessly into your existing AV systems. They support common protocols and standards such as DANTE, HDBaseT, SDVoE, and AES67 used in the AV industry.
Configuration Preparation
Step 1: Determine the switch's IP address
For the CX-Engine to recognize and configure your Netgear switch, you must first determine the switch's IP address. Netgear AV-Line switches are configured via DHCP by default. However, you can also set the IP address manually.
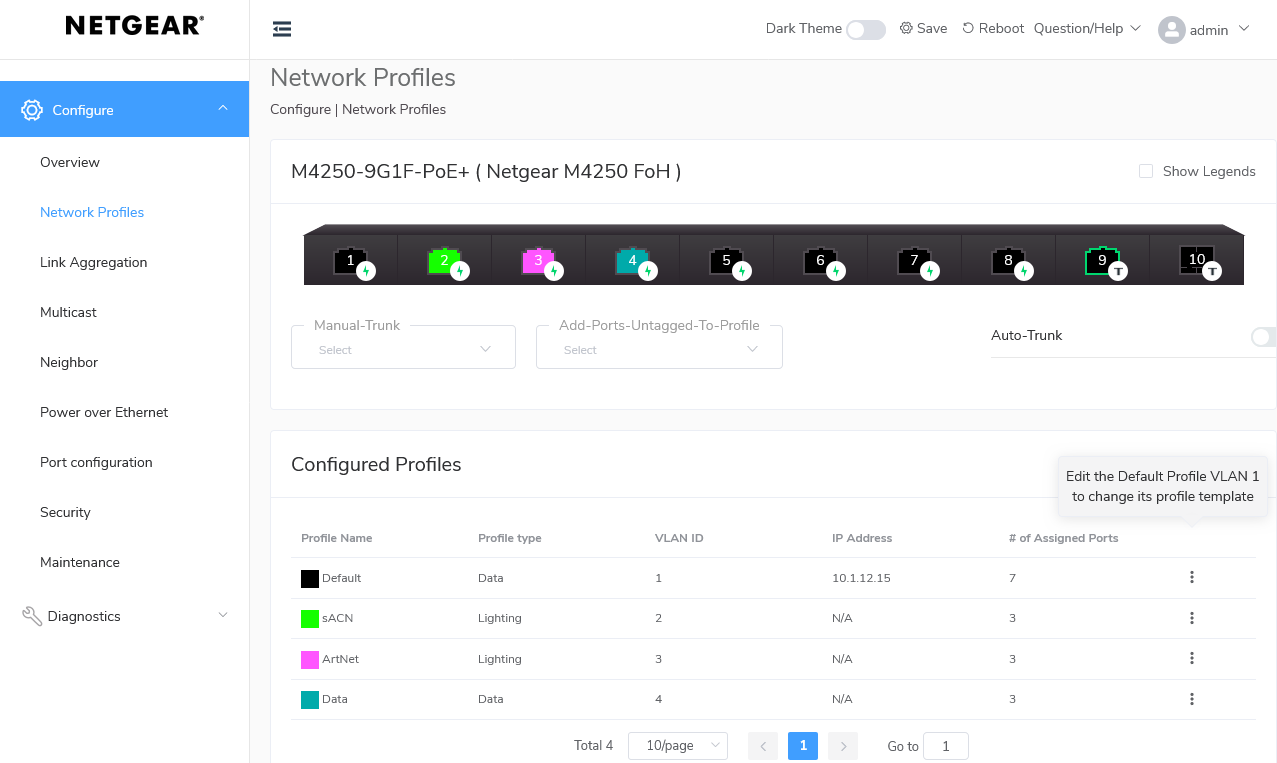
Additionally, they feature an OOB port (Out-Of-Band Management) intended for configuration via a separate network. You can reach the configuration interface via the IP address 192.168.0.239. In our example, the IP address 10.1.12.15 is used.
Step 2: Add the switch to the CX-Engine
Next, you need to add the switch to the CX-Engine. You do this via the CX-Engine's web interface, which you can access, for example, via Port A at 192.168.250.250. You can configure Port B individually via the CX-Engine's web interface.
Here's how to add the device:
- Log into the CX-Engine web interface
- Navigate to "Devices" → "Add Device"
- Select "Network Switch" as device type
- Enter your Netgear switch's IP address
- Configure the connection parameters with username and password
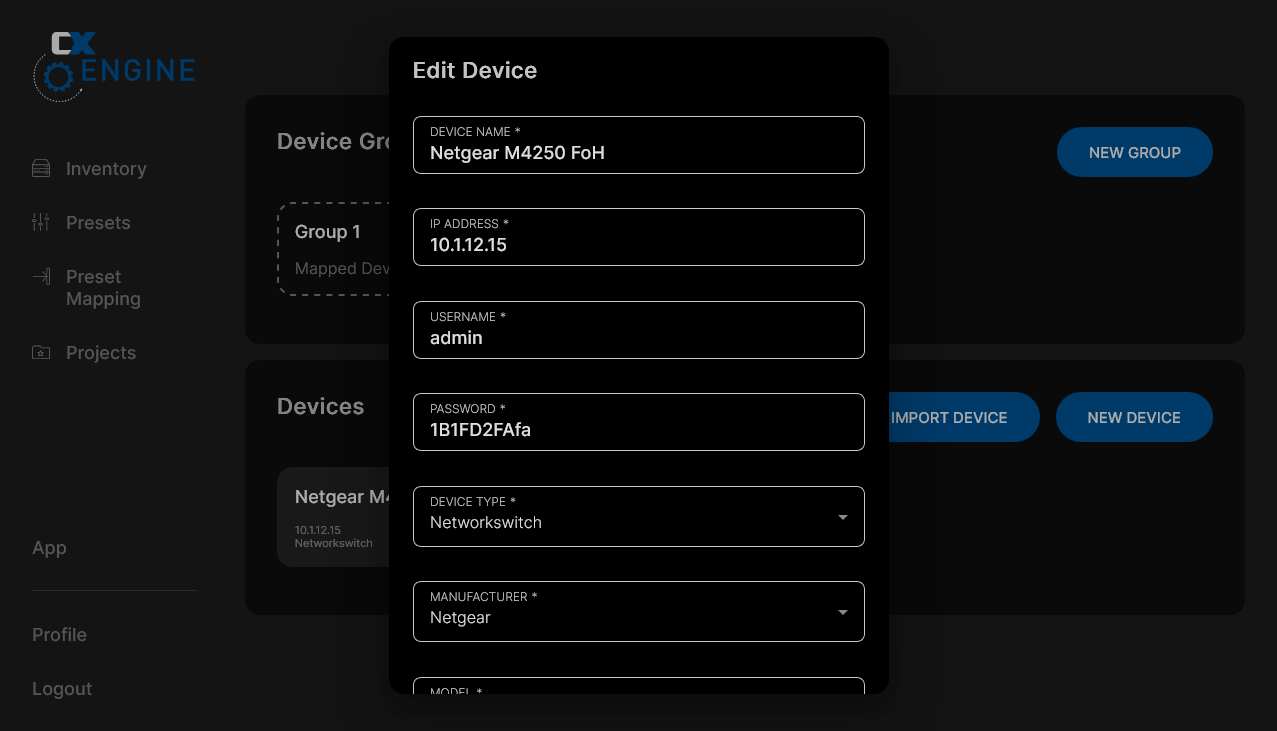

As you might have noticed, we don't need to specify a switch model here. The presets are only deployed to the extent that they are relevant for the switch.
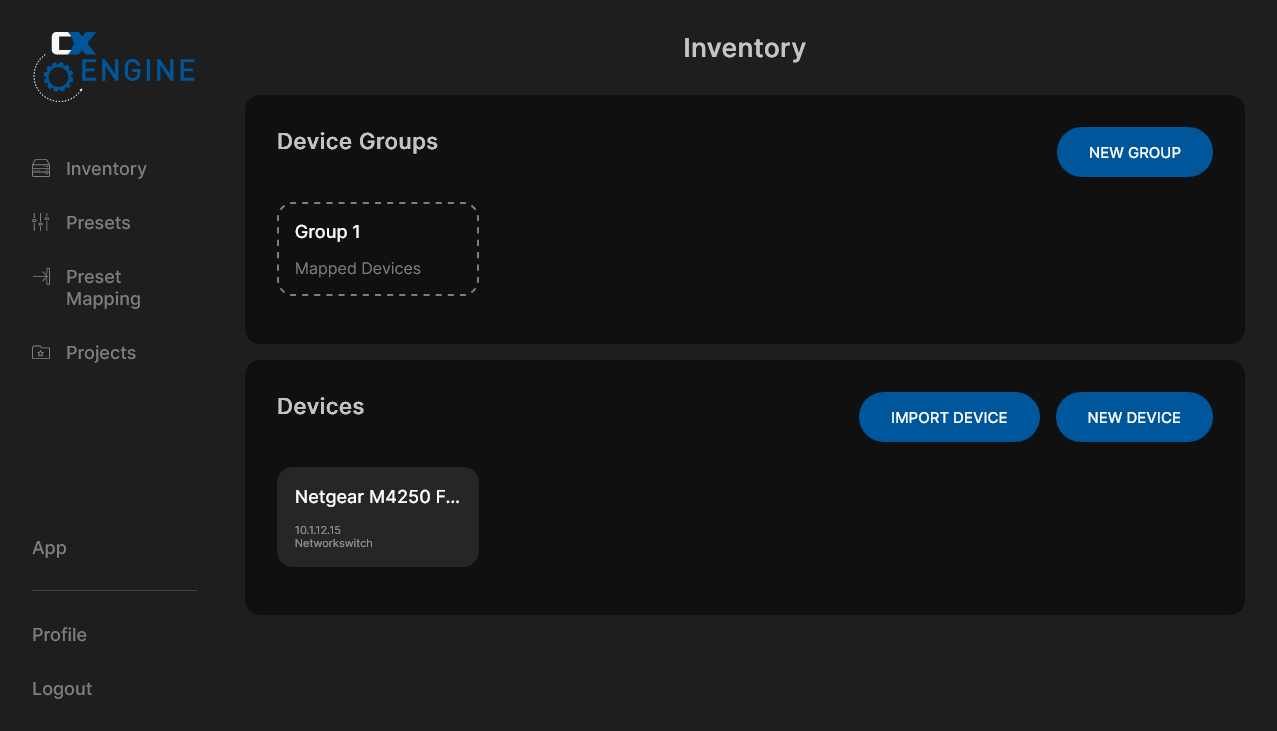
Your inventory now looks like this:
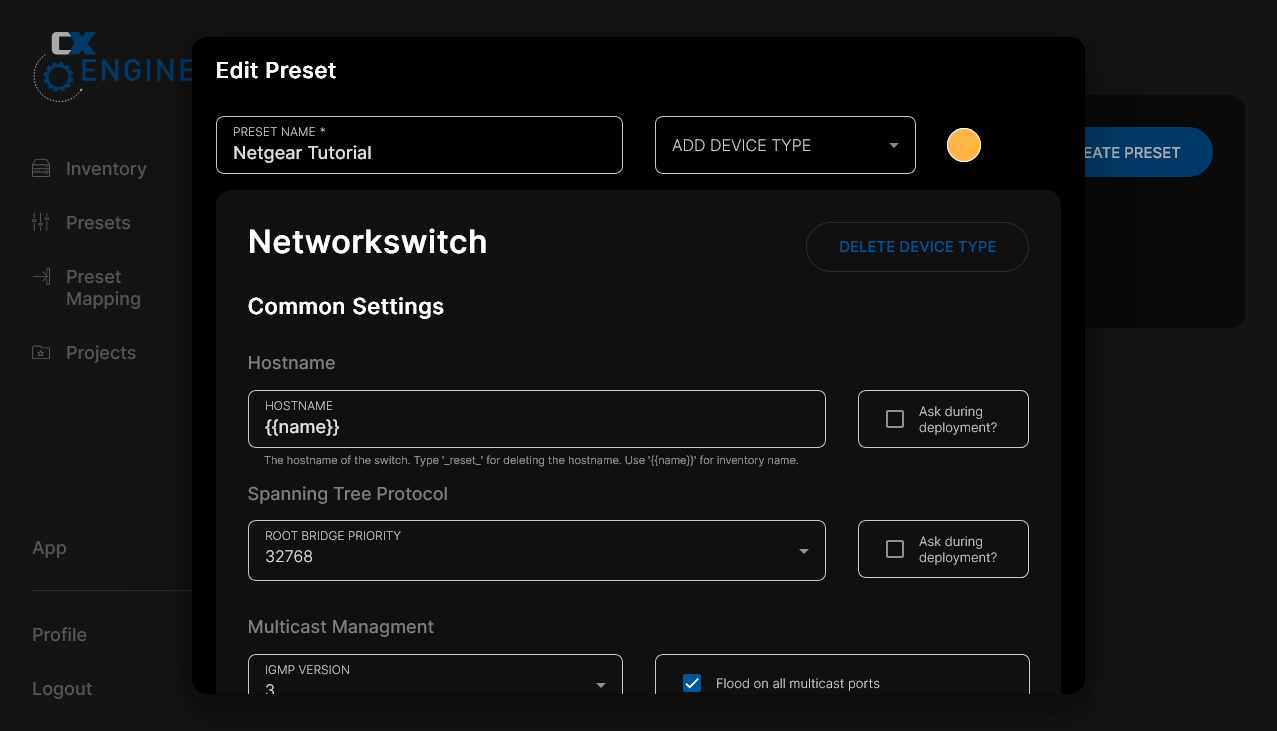
Step 3: Create a preset for the switch
The CX-Engine combines settings into presets. A preset is a predefined configuration that you can apply to one or more switches. This enables you to configure your networks quickly and consistently.
Here's how to create a preset:
- Switch to the "Presets" section → "Create New Preset"
- Enter a meaningful name (e.g., "AV-Studio-Basic-Config")
- Select "Network Switch" as device type and thus add the settings to the preset
Fun fact: You can also add multiple device types to one preset and thus create a preset for multiple device types.
Possible preset settings
Hostname: Assign a unique switch name. Here, the CX-Engine can also adopt the device name from the inventory when deploying.
STP Bridge Priority: Here you can set the priority for the Spanning Tree Protocol (STP). This is important to avoid loops in your network and optimize the network topology.
VLAN Configuration:
- sACN VLAN (VLAN 2): For sACN data traffic used for your lighting control
- ArtNet VLAN (VLAN 3): For ArtNet data traffic used for your lighting control
- Data VLAN (VLAN 4): For general data communication, e.g., for transmitting control data
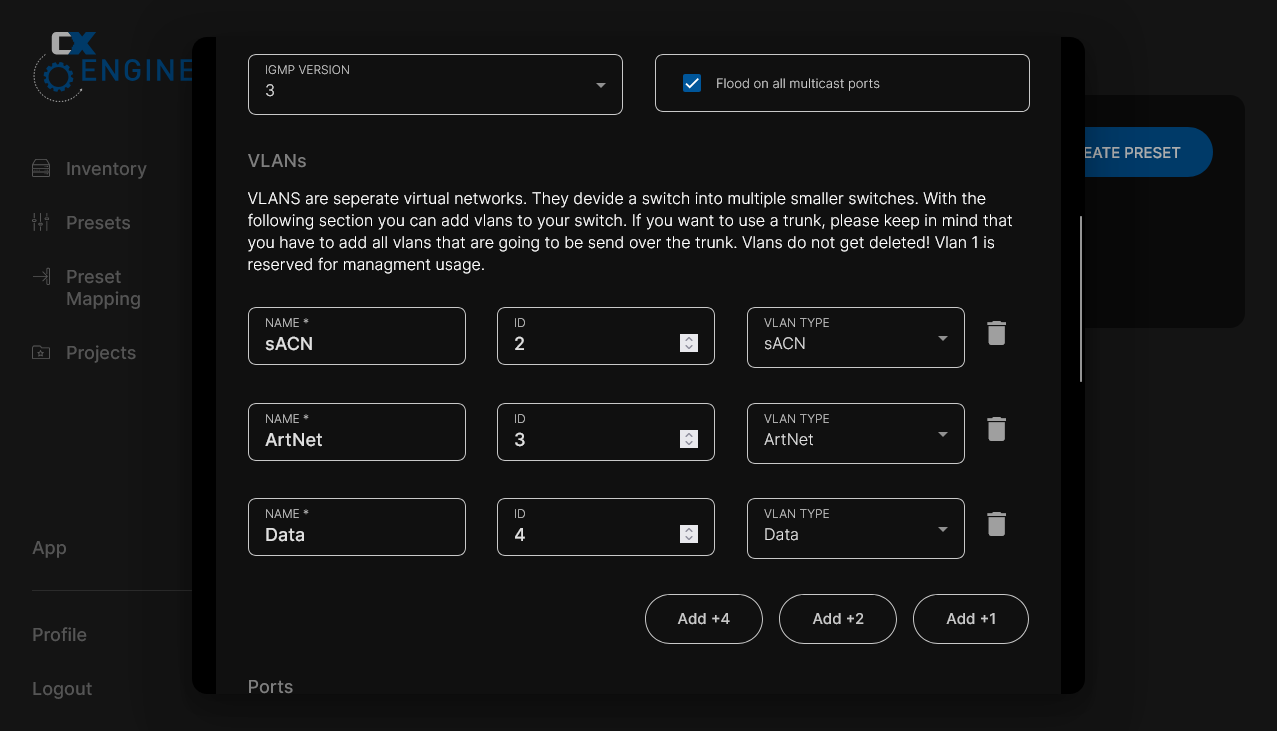
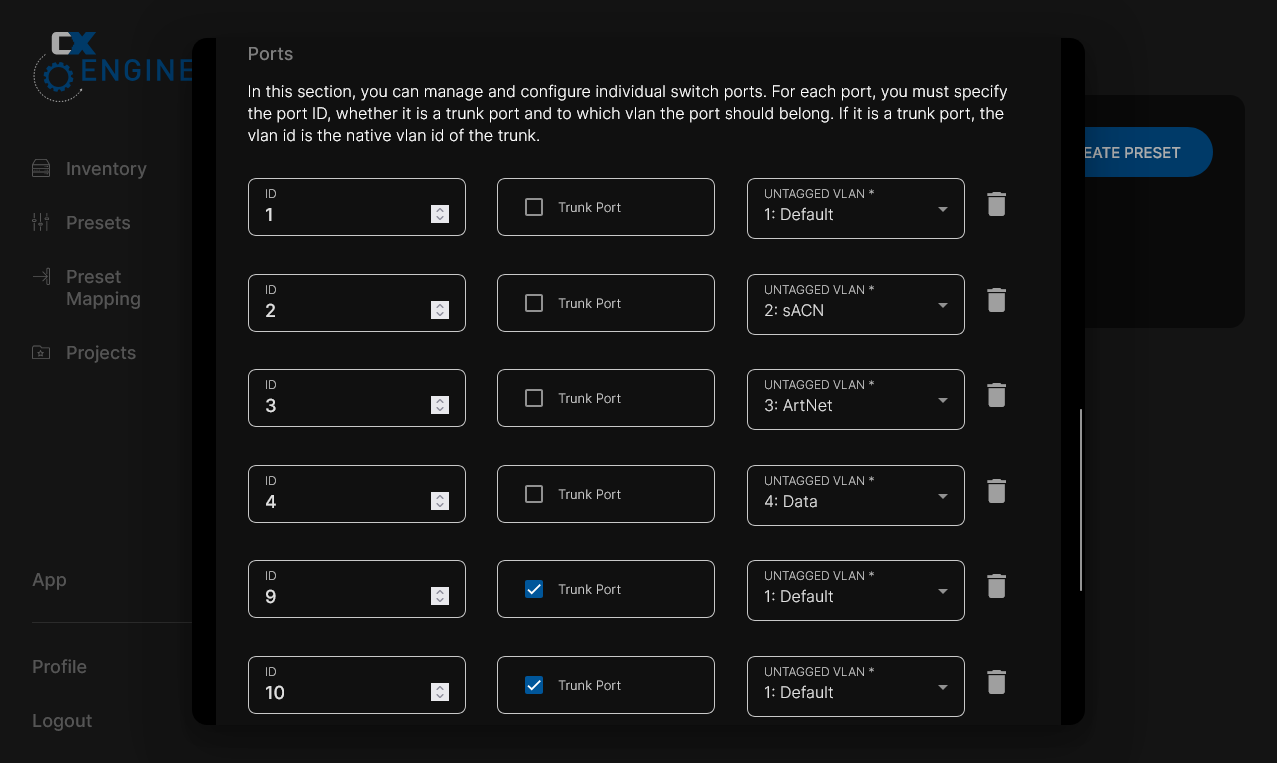
Port Configuration:
Here you can configure your switch's ports. The CX-Engine allows you to define ports as access ports or trunk ports. Access ports are intended for your end devices, while trunk ports can transport multiple VLANs.
Important here is that only the ports set in the respective preset are configured. This allows presets to override or complement each other. With the following preset, the created VLANs are assigned to the ports. The two highest ports are configured as trunk ports to transfer VLANs between switches. The remaining ports are configured as access ports for your connected end devices.
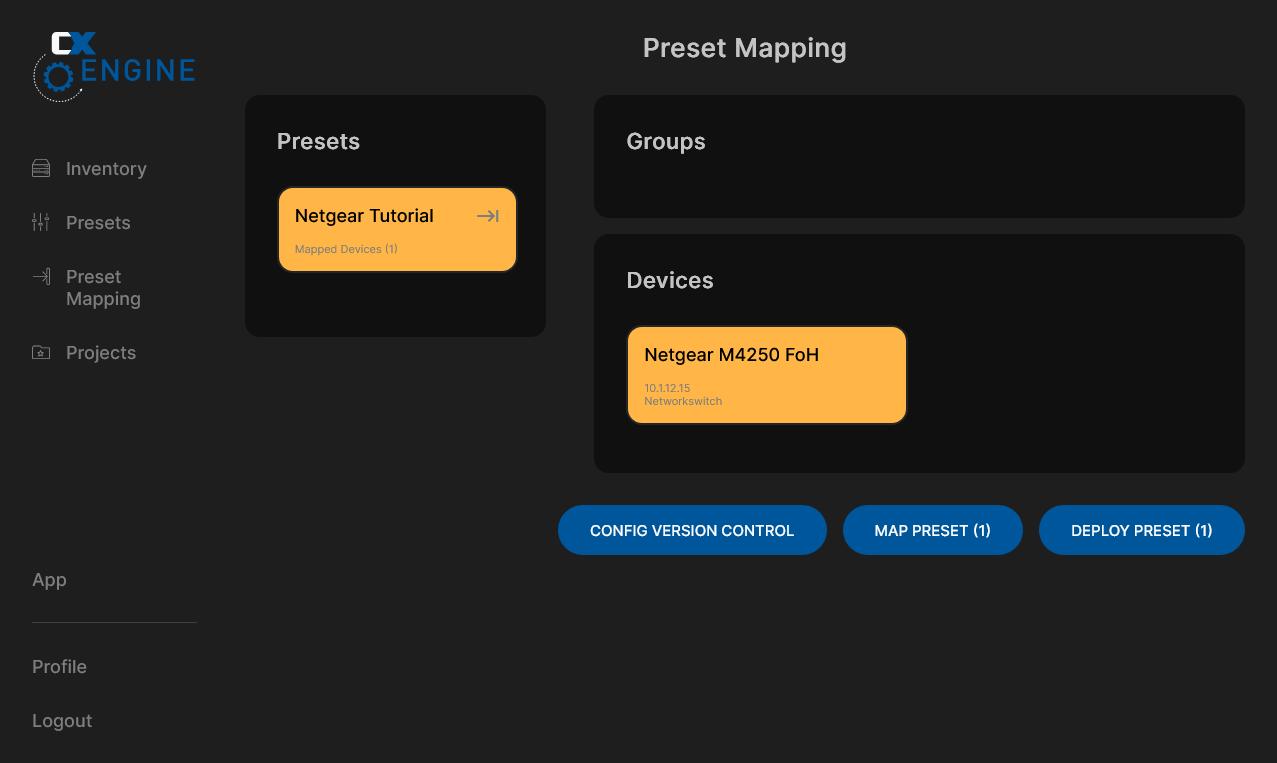
Step 4: Apply the preset to the switch
Via the preset mapping menu, you can now apply the created preset to your switch. Here you can select multiple network switches from different manufacturers, and the settings will be applied to all switches simultaneously and automatically.
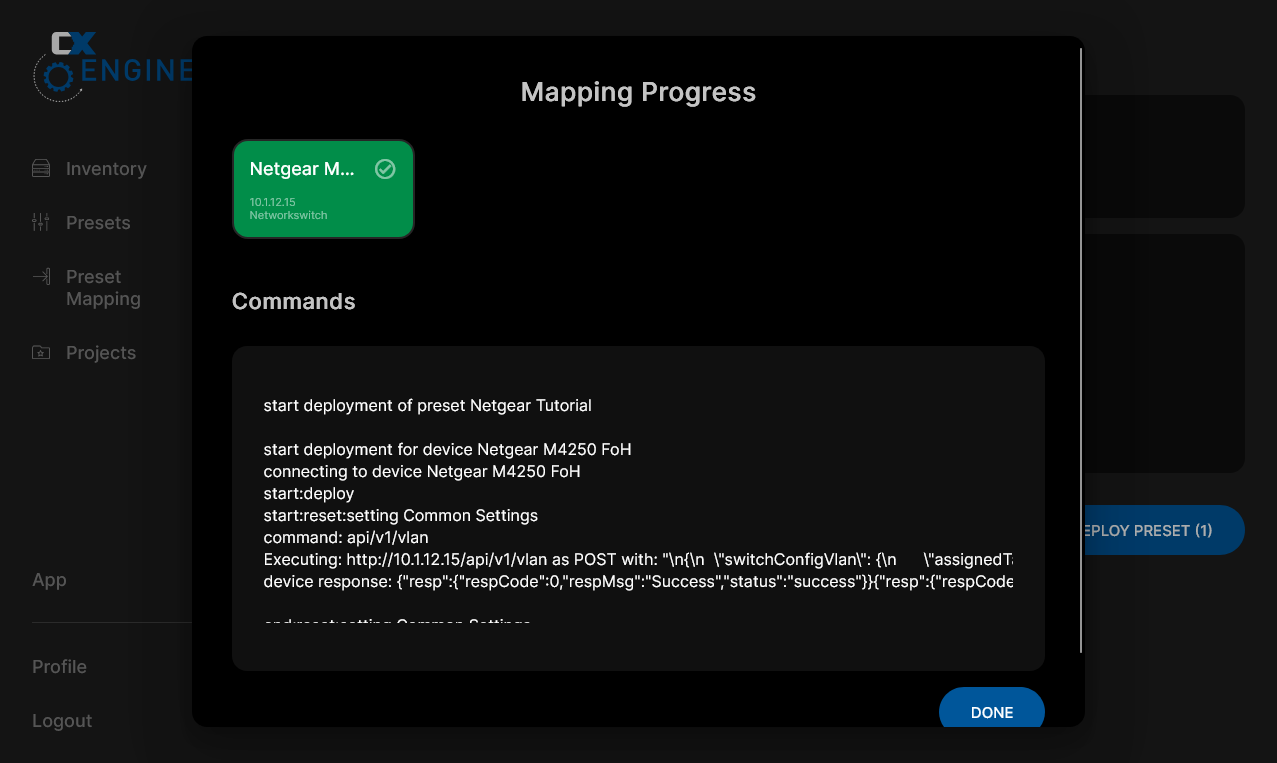
After deployment, you'll receive confirmation of successful preset application. In the displayed log messages, you can also track the assignment of ports and VLANs. If errors occur, they are also displayed in the log.
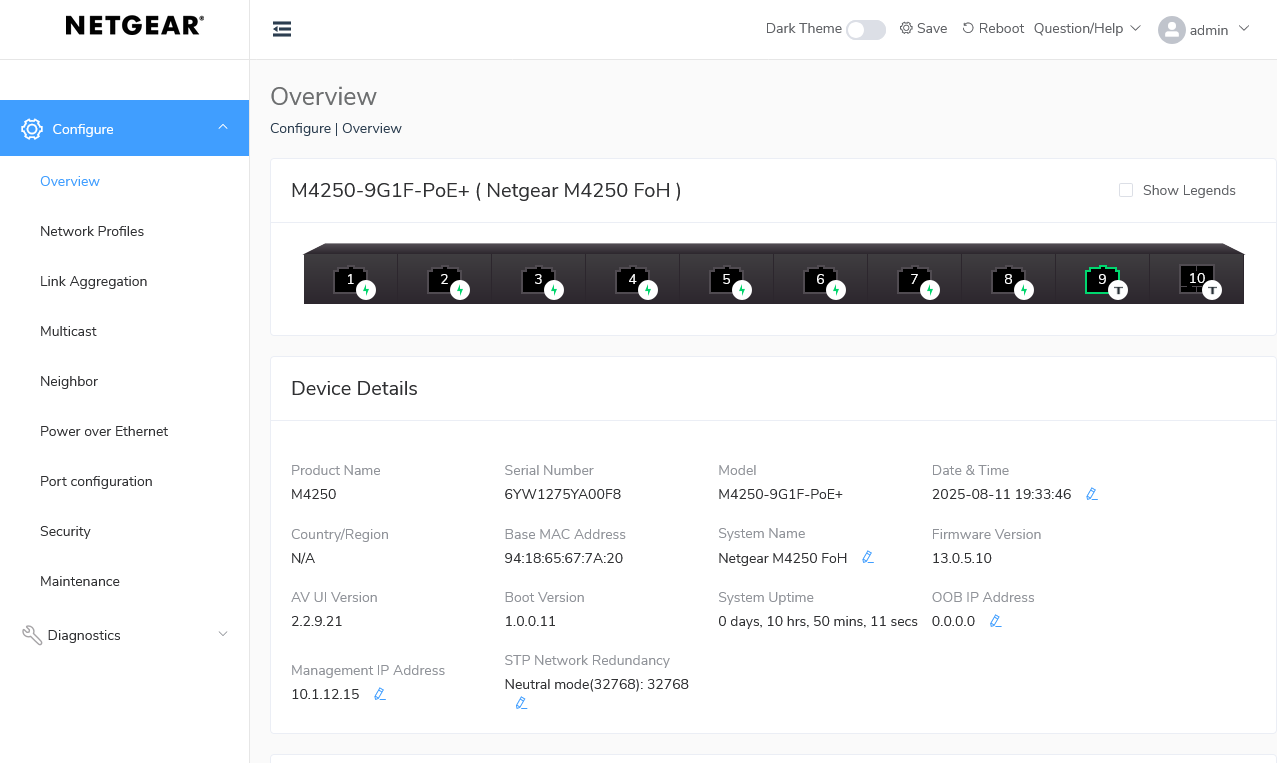
Result
You can now verify the configuration on the Netgear switch. In the image, you can see that the VLANs have been correctly assigned and the ports are configured accordingly.
Conclusion
Configuring Netgear switches with the CX-Engine is a simple and efficient process that enables you to quickly adapt your network infrastructure. The presets give you as a technician a quick overview of the configured settings and enable you to make rapid adjustments when changes are needed.
The integration of Netgear's AV-Line into the CX-Engine offers you a powerful solution for managing networks in event technology. The CX-Engine utilizes the built-in profiles of Netgear's AV-Line to ensure seamless integration and optimal performance for you.